Radiator Hot at Top and Cold at Bottom is a common heating issue that usually signals trapped air, restricted flow, or sludge blocking proper circulation. The homeowner can first bleed the radiator, check the TRV and lockshield settings, and confirm that the boiler pressure and pump speed are correct. Persistent cold lower sections often mean sludge buildup that may need flushing or professional power flushing. If multiple radiators show the same issue, a system imbalance or corroded parts may be present. The following guidance explains how to address each cause.
Key Takeaways
- Trapped air in the radiator prevents hot water circulation; bleed the radiator until a steady water flow appears.
- Partially closed TRV or lockshield valves restrict flow; check, free stuck pins, and adjust slightly to restore circulation.
- Sludge and corrosion settle at the bottom, blocking convection; consider flushing or powerflushing to remove deposits.
- Low system pressure or weak pump reduces flow; check boiler pressure and pump operation, and top up or repair as needed.
- If multiple radiators or persistent issues occur, call a heating engineer for balancing, boiler checks, or professional flushing.
Table of Contents
Quick Diagnosis: Why a Radiator’s Top Is Hot but Bottom Cold
Why is the top of a radiator warm while the bottom stays cold? A simple diagnostic approach identifies common causes without assuming technical expertise. First, consider trapped air: air pockets collect at the top, preventing hot water from circulating throughout the core and creating a warm upper section while the lower channels remain cool. Next, inspect the radiator valves; a partially closed lockshield or thermostatic valve restricts flow, resulting in uneven temperatures.
Radiator Hot at Top and Cold at bottom can also be caused by flow imbalance in the central heating circuit. Insufficient pump speed or improper balancing may leave some radiators underfed. Corrosion and sludge accumulation can settle toward the lower parts of the radiator, blocking circulation and reducing heat transfer. The system pressure and boiler output should also be checked, as low pressure or poor heat output can reduce the effectiveness of circulation. A methodical check of trapped air, valve positions, pump operation, and visible sludge can quickly narrow the likely cause and show whether simple adjustments or professional help is needed.
Bleed Trapped Air From a Radiator
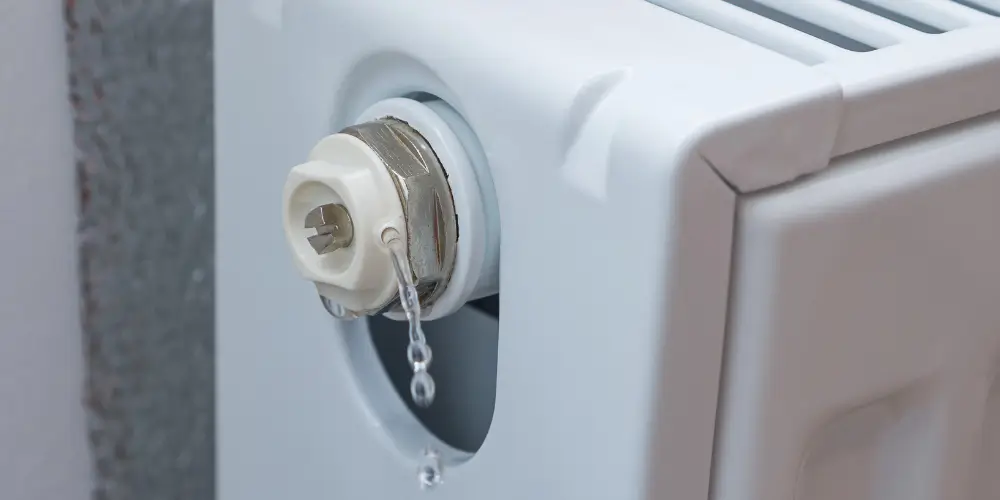
Having identified trapped air as a common cause of a radiator being hot at the top and cold at the bottom, the next step is to remove that air so that hot water can circulate fully. Radiator bleeding is a straightforward, low-risk procedure that restores convection. The necessary tools are a radiator key (or flat screwdriver for certain valves), a cloth, and a small container to catch drips. With the heating off and the system cooled, the bleed valve at the radiator’s top corner is opened slowly until a hissing sound changes to a steady stream of water; this indicates air has escaped and water now fills the space.
Close the valve promptly to avoid excess loss. After bleeding, the system pressure should be checked at the boiler and topped up if it falls below the manufacturer’s recommended level. Repeat for all radiators exhibiting cold bottoms, then restart heating and confirm even warmth. If air returns frequently, a professional inspection is advised to identify leaks or boiler issues.
Flush Sludge and Corrosion From a Radiator
Flush the radiator to remove sludge and corrosion that block heat transfer and restrict flow. Magnetite, rust, and debris accumulate over time, settling at the bottom and preventing hot water from circulating through the lower sections. To address this, isolate and drain the radiator, then perform a manual or power flush. A manual flush uses a hose to backflush water through the valve and bleed point until clear; a power flush employs a pump to force cleaner and water through the system, breaking up deposits more effectively.
Use compatible cleaning agents sparingly and neutralise inhibitors afterward to protect pipework. After flushing, refill with treated water and vent trapped air to restore balance. If deposits are severe or recurring, inspect for corroded components and consider professional chemical flushing or radiator replacement. Proper flushing restores flow, improves temperature uniformity, and prolongs system life while reducing energy waste.
Check Radiator Valves (Thermostatic and Lockshield)
One essential step is to inspect both the thermostatic radiator valve (TRV) and the lockshield to guarantee they regulate flow and temperature correctly. The TRV controls surface temperature by sensing air temperature; if stuck closed or set too low, the radiator will remain cold at the bottom. The lockshield balances flow between radiators and, if improperly positioned, can restrict return flow and reduce convective heat transfer.
- Check TRV position and operation: move the head through its settings; a seized pin may prevent opening.
- Feel valves when the system is warm: the inlet (TRV) should be hotter than the outlet; a cold outlet suggests restricted flow.
- Free a stuck TRV pin: isolate and gently tap or release the pin per manufacturer guidance to restore movement.
- Confirm lockshield is not fully closed: small adjustments (quarter turns) can open the return without rebalancing the whole system.
If valves appear faulty, replace them to restore proper flow.
Rebalance Radiators Across Your Home
Rebalancing radiators across a home guarantees even heat distribution by adjusting each radiator’s flow so the hottest rooms don’t monopolise boiler output. The process involves partially closing the lockshield valve on radiators closest to the boiler and opening those further away to increase their flow; this equalises temperature and reduces the tendency for some radiators to run hot at the top while others stay cool.
A simple method uses timed heating: open all valves fully, then sequentially close nearer lockshields in measured increments while monitoring surface warmth until each room reaches comparable heat within a set period. Accurate balancing relies on small adjustments and rechecking after the system stabilises; large turns can create imbalance. For those unfamiliar with valve operation, marking positions and recording steps prevents overcorrection. If manual rebalancing proves difficult, engaging a competent heating engineer guarantees systematic measurement and precise valve setting without touching boiler or pump controls.
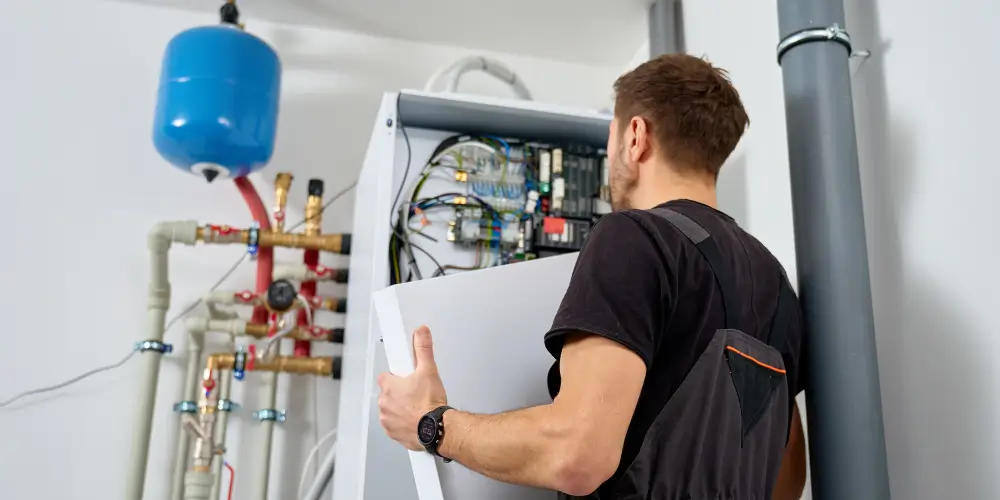
Boiler Pressure, Pump, and Flow Checks to Know About
Begin by checking the boiler pressure gauge and pump operation to identify common causes of uneven heat, such as low system pressure, airlocks, or a failing circulator. The observer should note the pressure reading (typically 1 — 1.5 bar cold) and whether the pump runs quietly and continuously when heating is on. Low pressure can reduce flow and leave lower radiator sections cool; trapped air will create partial flow blockage. A weak or seised pump impairs circulation, producing temperature stratification. Simple checks include listening for unusual pump noises, observing flow through radiator valves after bleeding, and confirming the pressure with the boiler cold and hot. If pressure is low, the system can usually be re-pressurised via the filling loop; bleeding can release airlocks. For clarity, these practical checks guide diagnosis before more invasive steps.
- Verify boiler pressure and record readings. Check, what should a boiler pressure be?
- Listen for pump noise and observe operation.
- Bleed radiators to expel trapped air.
- Inspect flow at radiator valves for movement.
When to Call a Heating Engineer and What They’ll Check
When should a heating engineer be called, and what will they check? A heating engineer should be contacted when simple user-level fixes (bleeding radiators, checking valves, topping boiler pressure) do not restore even heat, when multiple radiators are affected, when strange noises or leaks occur, or when the boiler shows fault codes. On arrival, the engineer will perform a systematic assessment: confirm boiler output and system pressure, test pump operation and flow rate, and inspect thermostat and TRVs for proper function.
They will examine radiator valves, check for blockages or sludge with flow tests, and use temperature readings to map heat distribution. If necessary,they will inspect pipework for airlocks, balancing issues, or corrosion, and assess the need for power-flushing or component replacement. The engineer will report findings, recommend targeted repairs or parts, and provide a cost estimate and safety reassurance before undertaking work.
Preventive Maintenance to Keep Radiators Heating Evenly
Regular preventive maintenance preserves radiator performance and reduces the risk of uneven heating by addressing common causes, such as airlocks, sludge, valve failure, and imbalanced flow, before they escalate. Routine checks focus on bleeding trapped air, inspecting valves and thermostatic radiator valves (TRVs), and monitoring system pressure. Periodic power flushing or chemical descaling prevents sludge build-up that insulates lower sections.
Balancing the system guarantees even flow rates; this may require incremental valve adjustments across radiators. Attention to the boiler’s expansion vessel, inhibitor levels, and signs of corrosion extends system life and maintains efficiency. Seasonal preparation, such as a pre-winter service, reduces sudden failures and uneven warmth. Homeowners can perform basic tasks safely, such as bleeding radiators and checking visible leaks, while leaving pressure work, inhibitor top-ups, and powerflushing to qualified engineers.
- Bleed radiators to release trapped air and restore full heat circulation.
- Inspect and exercise valves and TRVs for smooth operation.
- Schedule periodic descaling or power flushing to remove sludge.
- Balance radiators by adjusting lockshield valves for even flow.
Frequently Asked Questions
Can a Radiator Issue Affect Other Heating Zones in My Home?
Yes. A malfunctioning radiator can influence other heating zones by altering boiler pressure, reducing system flow, or triggering zone valve/thermostat responses. A technician can diagnose whether bleedings, balancing, or valve repairs will restore proper multi-zone operation.
Will Radiator Noise Return After Bleeding or Balancing?
Yes. They often return if underlying causes remain. Air removal and balancing reduce noise temporarily, but persistent kettling, sludge, pump issues, or incorrect flow will recreate sounds. Professional diagnosis and system flushing or repairs prevent recurrence.
Are Electric Radiators Prone to the Same Top-Hot Bottom-Cold Problem?
No, electric radiators typically avoid the top-hot-bottom-cold issue because they use internal electric heating elements and are often built-in convectors; however, uneven surface temperatures can still occur due to thermostat placement, airflow obstructions, or element faults.
Can Radiator Paint or Covers Cause Uneven Heating?
Yes. He notes that radiator paint can slightly insulate, while restrictive covers impede convection, both of which can worsen uneven heating; thin, high-temperature paint and ventilated covers minimise the impact, whereas thick coatings or sealed enclosures amplify temperature stratification.
Do Smart Thermostats Automatically Fix Radiator Imbalance?
No, smart thermostats do not automatically fix radiator imbalance. They optimise overall system temperature and schedules; resolving imbalances requires valve adjustments, system balancing, air bleeding, or installing thermostatic radiator valves and flow controls for individual radiators.
Conclusion
To conclude, Radiator Hot at the Top and Cold at the Bottom is usually linked to trapped air, sludge or corrosion, valve faults, or circulation issues in the boiler or pump. Simple actions such as bleeding air, flushing the system, checking and adjusting valves, and rebalancing can often restore even heat. Persistent problems or uncertain diagnostics should be checked by a qualified heating engineer to identify component failures and carry out necessary repairs or preventive maintenance.