
To remove a fire alarm cover safely, one should first cut power at the breaker and remove the battery, wear safety glasses and gloves, and use a stable ladder. Inspect the cover for clips, screws, or a twist‑and‑lock and apply minimal force while supporting the base to avoid wiring strain. Verify de‑energization with a tester, document connections, and keep fasteners organized. If unsure or if paint or damage interferes, a professional may be needed; more detailed steps follow.
Key Takeaways
- Cut power at the breaker and remove the battery backup before touching the alarm cover.
- Use a stable ladder, safety glasses, gloves, and an insulated screwdriver for protection.
- Inspect the cover for twist-locks, spring clips, or screws and release them using minimal force.
- Support the alarm base while removing the cover to avoid straining wiring or mounting plates.
- Verify de-energization with a tester, document wiring positions, and keep fasteners in a labeled container.
Table of Contents
Quick Steps to Remove a Fire Alarm Cover
How to Turn Off a Fire Alarm Without Damaging the System? Begin by cutting power to the alarm at the breaker or by removing the unit’s battery, then inspect the cover for clips, screws, or a twist-lock mechanism. Proceed with deliberate, confident motions: release clips by pressing or prying gently with a flat tool, turn twist-lock covers counterclockwise until they disengage, or remove visible screws with the correct screwdriver. Support the cover as it frees to prevent drops. If the cover conceals a dust screen or grille, lift it away and set it aside intact. Avoid yanking or using excessive force; that risks damage or dislodging internal wiring. Once removed, place the cover on a clean surface where it won’t be scratched or lost.
Note any fastener types and orientations, so reassembly is as fuss-free as possible. These steps prioritise autonomy and unobstructed action, enabling a swift, controlled removal that preserves the device and the user’s capacity to restore normal operation without dependence.

Gather Tools, PPE, and Estimate Time/Risk
Gather appropriate tools and personal protective equipment before attempting removal to minimise injury and damage. A practitioner selects only what is necessary: insulated screwdrivers, a stable ladder sized to reach the device without overextending, a soft cloth or non-sparking pry tool, and small containers for fasteners. Safety glasses and a dust mask protect eyes and airways; thin work gloves preserve dexterity while shielding hands. A flashlight or headlamp guarantees clear visibility in dim spaces.
How to remove a fire alarm cover? They assess the location and accessibility, estimating time and potential complications. Simple covers on accessible ceilings may take under ten minutes; recessed or painted units, or those with adhesive, require more time and care. They note risks: falling debris, stripped screws, or cosmetic damage to mounting surfaces. Contingency plans include having replacement screws, putty, and a helper available. Decisions favor efficiency and autonomy while minimising harm and preserving the option to restore the alarm to its original condition.
Cut Power and Disable the Alarm Safely
Before touching the unit, the practitioner cuts power to the circuit and disables the alarm to prevent shocks, false activations, or loud sirens. They locate the appropriate breaker or switch, confirm labeling, and switch power off. A noncontact voltage tester verifies that the fixture is de-energized. Where breakers are unlabeled or shared, the practitioner isolates the circuit at the panel and, when available, secures it with a lockout/tagout device.
Next, the practitioner silences the alarm system, following manufacturer guidance, using the control panel, an authorised key, or the temporary silence feature to avoid triggering building-wide alerts. If battery backup is present, batteries are removed or disconnected to prevent residual power. Communication with occupants or stakeholders occurs before disabling devices to preserve safety expectations. The practitioner documents actions, notes breaker position, and posts warning signage at the panel to prevent accidental re-energization. This disciplined approach preserves personal freedom to work safely while minimising disruption.
Remove Twist‑and‑Lock and Clip Fire Alarm Covers
To remove twist‑and‑lock or spring‑clip fire alarm covers, the technician identifies the cover type and applies the minimal, directed force needed to release its retention mechanism, rotating counterclockwise for twist‑and‑lock models or compressing the visible clips for spring‑clip designs, while supporting the base to prevent strain on the wiring or the mounting plate. The technician keeps movements deliberate, avoiding jerks that could dislodge connectors or damage the ceiling. If resistance is encountered, inspect for a hidden latch, locking tab, or locating notch to prevent forced removal.
A small flat tool may be used to gently pry the clip edges where recommended by the manufacturer, but only with care to avoid deforming the plastic. Once freed, the cover is lowered smoothly and set aside in a clean area, preserving airflow openings and labels. The technician notes any broken retention components for later replacement, preserving options for a safe, independent choice between repair and return to service.
Disconnect and Remove Hardwired Alarms and Bases
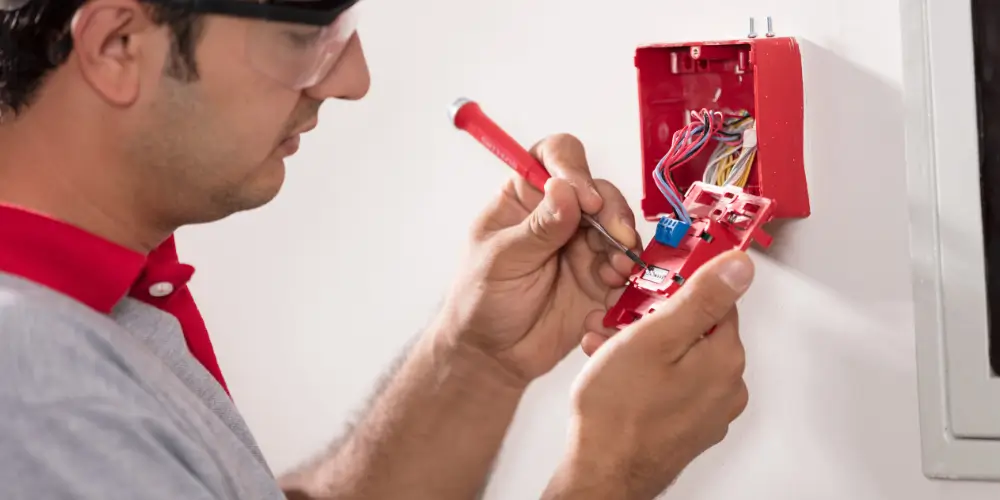
After the cover is removed and set aside, the technician isolates power at the circuit breaker or disconnects the building’s alarm power source, then verifies the absence of voltage at the alarm base with a multimeter. Once confirmed, the technician documents wire positions or photographs connections to preserve system integrity. The alarm head is detached from its mounting plate by releasing retention clips or unscrewing the fasteners; any locking shroud is opened with the appropriate key. The wiring harness is disconnected; pull gently on the connectors rather than the conductors to avoid damage.
For alarms hardwired to a junction box, the technician opens the box, notes the conductor colors and labels, and removes wire nuts or terminal screws while keeping the conductors neatly folded back. The base is then unscrewed from the electrical box and removed. All removed components are stored or tagged for later reinstallation. The technician leaves wiring ends insulated and the circuit breaker off until the replacement or maintenance task is complete.
Clean, Inspect, and Replace Batteries or the Cover
With power confirmed isolated and components set aside, the technician inspects the alarm cover, battery compartment, and contact points for corrosion, dust, or damage, using a soft brush and suitable cleaner to remove debris without wetting electronic parts. The technician then evaluates battery condition: swollen cells, leakage, or corroded terminals prompt replacement. Fresh batteries of the manufacturer-recommended type are installed, ensuring correct polarity and firm contact. If a sealed, non-replaceable battery is present and life is exhausted, the unit is noted for replacement rather than attempted repair.
Next, the cover is examined for cracks, warping, paint, or missing latches; minor dirt is wiped away, while compromised covers are swapped for approved replacements that maintain airflow and sensor alignment. After reassembly, the technician performs a functional test according to manufacturer guidance and documents battery date, cover condition, and any parts replaced. This preserves safety while respecting an owner’s autonomy to manage and maintain devices responsibly.
Fix Stuck or Painted‑Over Alarm Covers
Inspecting batteries and the cover often reveals a separate problem: covers that refuse to release because paint has sealed seams or grime and corrosion have fused components. The individual should work deliberately to free the cover without damaging the alarm or surrounding finishes. Begin by cutting through the paint bead with a thin utility knife or razor, sliding it along the seam to break the seal. Use a soft-bristle brush or canned air to remove loose debris; a cotton swab dipped in isopropyl alcohol can dissolve stubborn grime.
Apply gentle, even pressure to the cover at the proper opening points; avoid prying from the faceplate, as it can crack the plastic. For corroded metal clips, a few drops of penetrating oil applied to the joint can loosen parts after a short wait; wipe away any excess oil before powering the unit. After removing the cover, inspect mounting hardware and contact points, clean as needed, and reassemble securely to restore full, independent operation.
When to Stop and Call a Professional (Electrician or Alarm Service)
Several clear signs indicate it is time to stop DIY attempts and call a professional: persistent electrical arcing or burning smells, damaged wiring or backboxes, alarms that won’t reset despite battery and cover checks, physical damage to the sensing chamber, or any uncertainty about local code compliance or hardwired connections. In these cases, autonomy is best preserved by deferring to trained electricians or certified alarm technicians who carry proper tools, replacement parts, and liability coverage. Professionals diagnose hidden faults, safely isolate circuits, and guarantee replacements meet code and manufacturer requirements.
For tenants or homeowners wanting control, calling a pro prevents costly mistakes, voided warranties, or unsafe work that restricts future options. Choose licensed, insured providers with clear estimates and concise explanations of the scope of work; insist on documentation and photos. When alarms are interconnected, aged, or exhibit intermittent faults, prioritise a service call instead of prolonged tinkering. This balances independence with safety, minimising disruption while protecting people and property.
Frequently Asked Questions
Can Removing the Cover Void My Home Insurance or Warranty?
Yes; removing the cover can void insurance or warranty if it disables, alters, or damages the alarm. The homeowner should consult the policy terms, manufacturer guidelines, and the authorised maintenance documentation to protect coverage and preserve freedom of choice.
Can I Remove an Alarm Cover in a Rented Property Without Permission?
No; they should not remove an alarm cover in a rented property without permission. Tenants risk breaching lease terms, voiding insurance, and creating safety hazards. Seeking landlord consent preserves freedom while avoiding legal and safety consequences.
How Do I Dispose of Old Smoke Alarm Units Responsibly?
They should recycle or dispose of old smoke alarm units responsibly by checking local e-waste guidelines, removing batteries for separate recycling, using designated drop-off centers, or returning units to manufacturers or retailers offering take-back programs.
Will Removing Covers Trigger a Building-Wide Alarm System?
Usually no; removing a local smoke alarm cover rarely triggers the building-wide system unless the unit’s tamper switch, wiring, or integrated detector is disturbed. One should proceed cautiously and consult building management to preserve autonomy and safety.
Are There Seasonal Maintenance Schedules for Different Alarm Types?
Yes. They recommend seasonal maintenance schedules for smoke, heat, and CO detectors, typically quarterly visual checks, semiannual battery or functional tests, and annual professional inspections, allowing occupants autonomy while ensuring reliable, code-compliant system performance. Chec out the detailed blog post on How Often Should You Check Fire Alarms? A Complete UK Guide.
Conclusion
To summarise, How to remove a fire alarm cover removing a fire alarm cover demands careful planning, protective gear, and power isolation to prevent injury or false alarms. For twist-and-lock or clip designs, gentle manipulation usually suffices; hardwired units require terminal disconnection and caution. Clean, inspect, and replace batteries or covers promptly, and use recommended techniques for stuck or painted-over units. If uncertainties, damage, or wiring issues arise, stop and hire a licensed electrician or alarm service to confirm safety and code compliance.