
Wiring a light switch in the UK requires strict adherence to BS 7671 and Part P. Work must be isolated at the consumer unit and proved dead with a voltage tester. Use the correct twin‑and‑earth cable, insulated tools, and follow UK colour codes; connect live to COM, switched live to L1, keep neutrals in the backbox, and bond earths. Tighten terminals to torque, secure cable sheaths and test the circuit. Further guidance covers multiway layouts, troubleshooting and when to call a qualified electrician.
Key Takeaways
- Always isolate the lighting circuit at the consumer unit and verify it’s dead with a proven voltage tester before touching wiring.
- Use the correct tools and compliant parts (BS 7671), and follow UK colour codes and cable sizes (T&E 1.0 mm²/1.5 mm² for lighting).
- Wire single-pole switches with live to COM, switched live to L1, neutrals looped in the backbox, and earths to the earth terminal.
- Secure conductors with correct torque, clamp cable sheaths, avoid exposed conductors, and tidy cables to prevent overheating or contact.
- Call a registered electrician for complex, unclear, or hazardous situations, and keep certification and records for compliance and safety.
Table of Contents
UK Regulations and When to Hire an Electrician
Because electrical work carries legal and safety obligations, homeowners must understand UK wiring regulations and the limits of DIY. The Building Regulations (Part P) and the IET Wiring Regulations (BS 7671) set standards for safe installation and specify when qualified electricians must perform or certify work. Readers are encouraged to balance autonomy with compliance: simple tasks like replacing a switch faceplate may be permissible, but any work involving new circuits, alterations to consumer units, or installation in special locations (bathrooms, outdoors) typically requires a registered electrician and notification to building control.
Competent Person Schemes allow certified tradespeople to self-certify compliance, providing the legal freedom to act without undue bureaucracy. Liability, insurance and resale implications make adherence to standards pragmatic rather than restrictive. When doubts arise about isolation, circuit identification, or protective device selection, hiring an electrician helps preserve safety and legal standing. Clear records and certification safeguard future occupants and the homeowner’s independence.
Tools, Parts and Cable Types for UK Light Switch Wiring
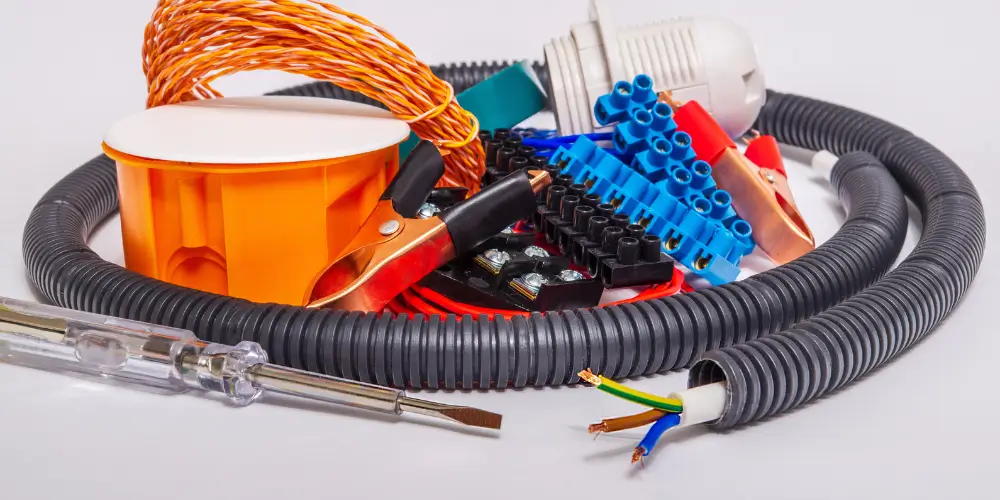
Several essential tools and specific cable types are required to safely wire a light switch in the UK and meet regulatory standards. The toolkit typically includes an insulated screwdriver set, wire strippers, combination pliers, a voltage tester (for later steps), a compact spirit level, and a torque screwdriver for terminal tightening. A suitable junction box and switch mounting screws are also needed. The parts list covers single-pole or two-way switches, switched live connectors, earth terminals, and insulated sleeving for live conductors in lighting circuits.
Cable choices must follow UK colour codes and current ratings: twin-and-earth (T&E) 1.0mm² or 1.5mm² for domestic lighting circuits is common; 2.5mm² is reserved for ring final or heavier loads. Flex (HO5VV-F) may be used within fittings only. Fire-resistant cable is specified where required by building regulations. All components should be BS 7671-compliant and selected to enable safe, flexible installation while respecting personal autonomy in home improvement projects.
Isolate Power and Prove the Circuit Is Dead
Turn off the lighting circuit at the consumer unit and label or lock off the correct breaker or fuse to prevent accidental re-energisation. After isolation, the operative must test that the circuit is dead using a suitable voltage tester or calibrated multimeter rated for the installation. Verify the tester’s operation on a known live source before and after testing to confirm functionality. Probe at the switch terminals and exposed conductors for live, neutral, and earth to ascertain that no residual or induced voltage is present.
If any voltage is detected, stop and reassess isolation; do not proceed. Where multiple circuits share a consumer unit, confirm adjacent circuits remain energised only where intended, and clearly mark the isolated supply. When using test instruments, follow manufacturer instructions and maintain safe distances from live parts. Record the isolation and test results, including time and tester ID, to support traceability and personal accountability while preserving the freedom to work confidently and safely.
Wire a Single‑Pole (One‑Way) Light Switch: Step‑by‑Step
With the circuit verified dead and isolation recorded, preparation for wiring the single‑pole (one‑way) switch can begin. The person approaches the task methodically: strip cables to the correct length, identify the live feed and switched live, and ensure the earth and neutral are appropriately managed in the backbox. The live (brown or red) connects to the COM terminal; the switched live (usually brown with a red sleeve or red with a brown sleeve) goes to L1. Earth wires are tied to the earth terminal and insulated if required; neutrals remain joined in the backbox and are not connected to the switch. Fasten conductors with the specified screw torque, respecting the manufacturer’s guidance.
- Confirm conductor colours and sleeving for freedom of movement
- Keep sleeving visible and secure to denote switched live
- Maintain adequate conductor length; avoid excess slack
- Guarantee cable sheaths are clamped at the backbox entry
- Position the switch to allow unobstructed toggle operation
Work is completed with care, respecting choice and autonomy in the home.
Test, Secure Connections and Finish Safely
They begin by visually checking each termination for correct seating and sleeving. Next, they tighten all terminal screws to the manufacturer’s torque, avoiding over‑compression that could damage conductors. A continuity tester or multimeter verifies connections: live to switch, neutral continuity where applicable, and earth bonded correctly. Insulation and cable clamps are inspected to guarantee no conductor stress and that sheathing extends to the clamp.
Once electrical integrity is confirmed, the faceplate is fixed with even pressure, so screws are snug but not overtightened. The enclosure is cleaned of debris, and the protective barrier or blanking plate is refitted where needed. Before restoring full power, a safe recheck of the circuit with the tester confirms no faults. Finally, they document the change for future reference and advise occupants on basic switch use and emergency isolation. These steps protect freedom to use the space without compromising safety.
Common Wiring Layouts: Two‑Way, Switched‑Live and Multiway
Common lighting configurations in UK domestic wiring include single‑pole, two‑way, switched‑live and multiway arrangements, each serving different control and circuit-routing needs. The discussion remains factual and concise, describing how these layouts enable flexible control over lights while noting typical conductor routes and terminal usage without burdening the reader with procedural troubleshooting.
- Single‑pole: simple one‑switch control, live to common, neutral looped at fitting.
- Two‑way: two switches control one luminaire; uses common and two travellers between switches.
- Switched‑live: live feed routed via switch to fitting; neutral usually permanent at fitting.
- Intermediate (multiway): allows three or more control points using intermediate switch(es) plus two two‑way switches.
- Multiway circuits: can group multiple fittings or zones, with shared neutrals and isolated switched lives.
The tone empowers an independent-minded reader to understand options; final selection depends on desired control points, aesthetic freedom, and compliance with regulatory standards.

Troubleshooting Common Faults and Quick Fixes
A concise troubleshooting approach helps isolate frequent faults no light, intermittent operation, buzzing, or tripping by systematically checking power, connections, and fittings in that order. First confirm supply at the consumer unit and the switch using a non-contact tester; a dead circuit or blown fuse is a common, simple cause. Next, inspect switch terminals and flexes for loose or corroded connections; tighten or re-terminate with the correct sleeving and strain relief if safe to do so.
Examine the lamp and holder for the correct type, secure seating, and signs of overheating; replace bulbs or fittings that show damage. For buzzing or dimming, check for poor contact or incompatible dimmer/load combinations. If a breaker trips, isolate the affected circuit and look for exposed conductors or signs of shorting at junctions and switchbacks. Throughout, work methodically, document findings, and restore neat, compliant cable runs to prevent recurrence.
When to Stop and Call a Professional
After basic checks fail to restore safe operation, it is time to stop and call a professional. The person values autonomy but recognises limits; persistent faults, unclear wiring, or safety risks mean relinquishing the job to a qualified electrician protects life, property, and future freedom to use the space without worry. Callouts should be prompt when risks exceed DIY skills.
- Bare or damaged conductors discovered inside the switch backbox.
- Repeated tripping of RCD/MCB after isolating the circuit.
- Smell or signs of burning, scorched terminals or discoloured wiring insulation.
- Complex multiway switching, shared neutrals or unknown cable origins.
- Lack of proper tools, certification or confidence to work live-free.
A certified electrician will isolate, test, and document repairs, ensuring compliance with UK wiring regulations and maintaining insurance. Engaging help early is a practical assertion of independence: it safeguards the home while freeing one to focus on other projects.
Frequently Asked Questions
Can I Use Smart Bulbs Instead of Rewiring Switches?
Yes they can. The person chooses smart bulbs to avoid rewiring; they gain remote control, automation, and simpler installation, though limited by existing fittings, hub compatibility, and potential loss of physical switch control without additional hardware.
How Do I Choose a Dimmer Compatible With UK Wiring?
They should match the dimmer to the bulb type (LED, halogen), check UK mains voltage and load range, prefer trailing-edge for LEDs, guarantee neutral/earth wiring compatibility, verify switch size and heat dissipation, and choose a reputable, certified model.
Are Batteries Required for Smart Switch Installations?
No, batteries are not typically required; most smart switches draw power from the mains (neutral or via a capacitor). The installer should verify the specific model and wiring availability, preserving user autonomy to choose compatible, non-battery options.
What PPE Should I Wear Beyond Basic Gloves and Goggles?
They should wear insulated boots, flame‑resistant clothing, and a certified face shield; a voltage‑rated insulated jacket and arc‑flash rated gloves where applicable; and hearing protection and a respiratory mask when working in confined or dusty spaces.
Will Rewiring Affect My Home Insurance or Warranty?
Yes. They should expect insurers and warranties to be affected: unauthorised rewiring can void policies and guarantees, while certified work with electrical certificates usually preserves coverage, provided notifications and installation standards are met.
Conclusion
Wiring a light switch in the UK requires strict adherence to regulations, the use of the correct tools, and careful isolation of power before any work begins. Following step‑by‑step procedures for single‑pole installations, testing and securing connections reduces risk, while understanding common layouts helps diagnose faults. For complex or uncertain situations, or where regulations apply, a qualified electrician should be engaged. Prioritising safety and compliance guarantees reliable, safe lighting installations and prevents dangerous consequences.